Aurigami User Guide
This blog explains how to lend and borrow NearX on Aurigami.
Aurigami is the native money market in Aurora that allows you to lend, borrow & earn.
Here’s a step-by-step guide on how you can use NearX as collateral to generate strong yields on Aurigami:
Lending
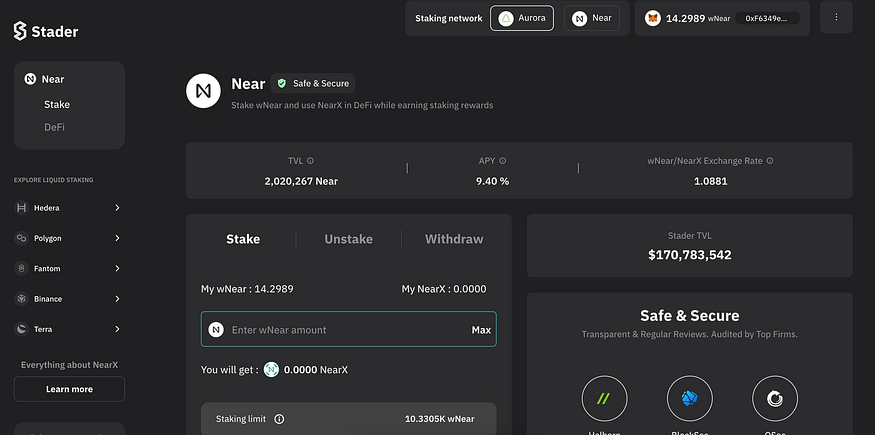
- Stake wNEAR with Stader & get NearX. Link to the $wNear staking guide — click
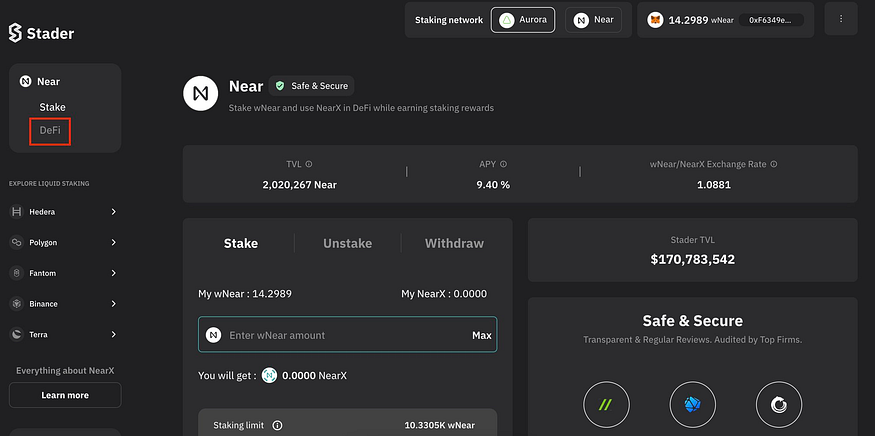
- Click on the “DeFi” button, on Stader-Aurora dApp.
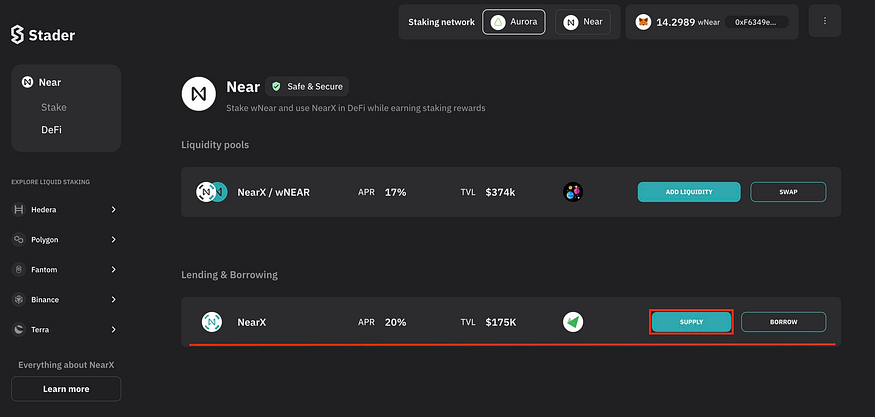
- On the DeFi page under Lending and Borrowing section. You can see NearX-Aurigami option, click on the “SUPPLY” button.
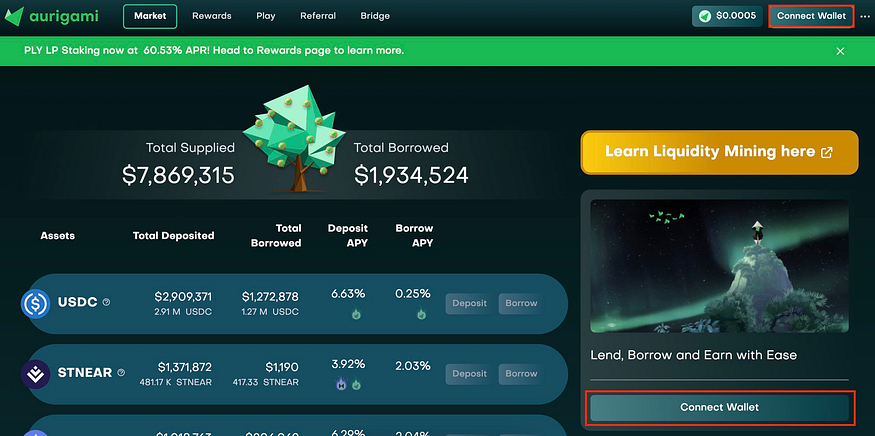
- You will be navigated to Aurigami. Please connect your wallet.
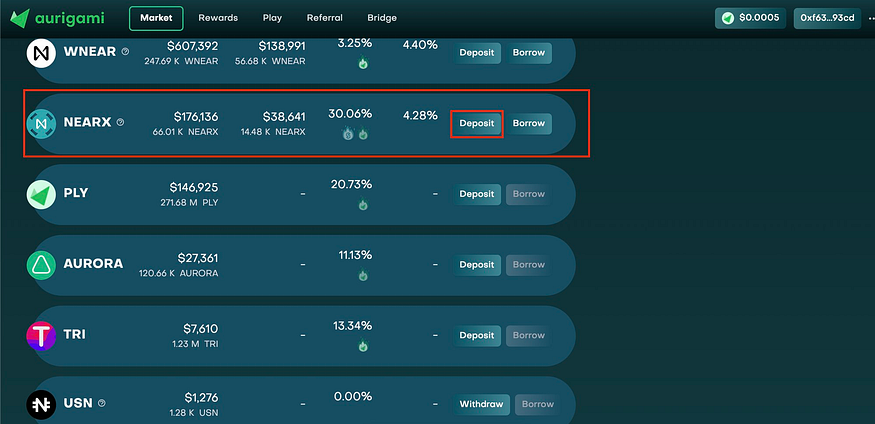
- Check for NearX out of the given options and click on the “Deposit” button.
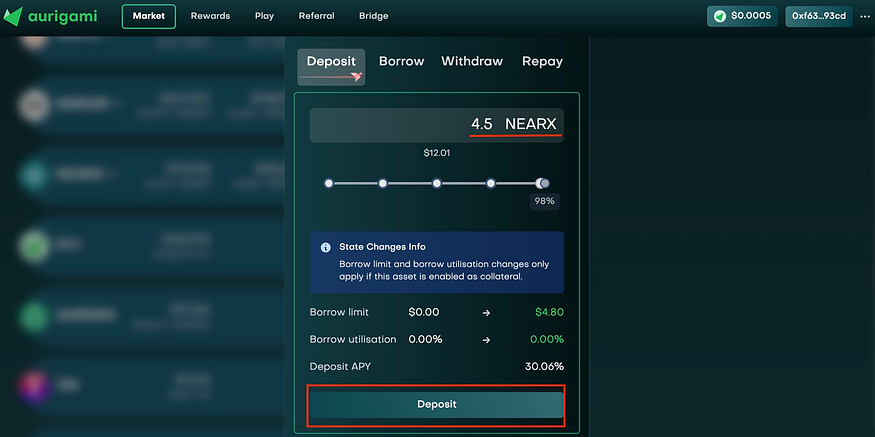
- Enter the amount of NearX you wish to deposit and click on the “Deposit” button.
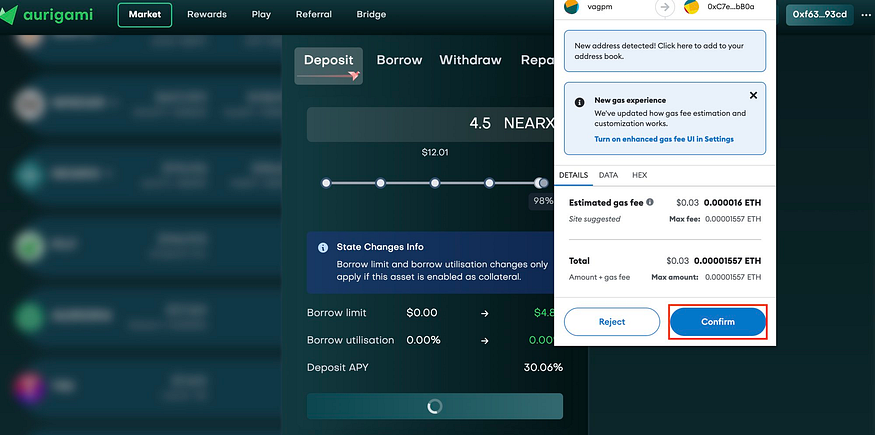
- Approve the transaction on your Wallet.
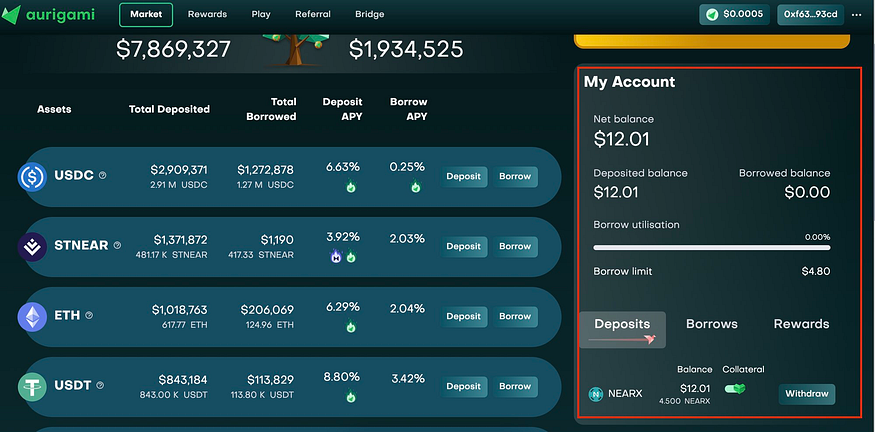
- Done! You can check your deposits in the “My Account” section
Borrowing
- Enable the deposited assets as collateral by clicking on the collateral toggle button under the “My Account” section.

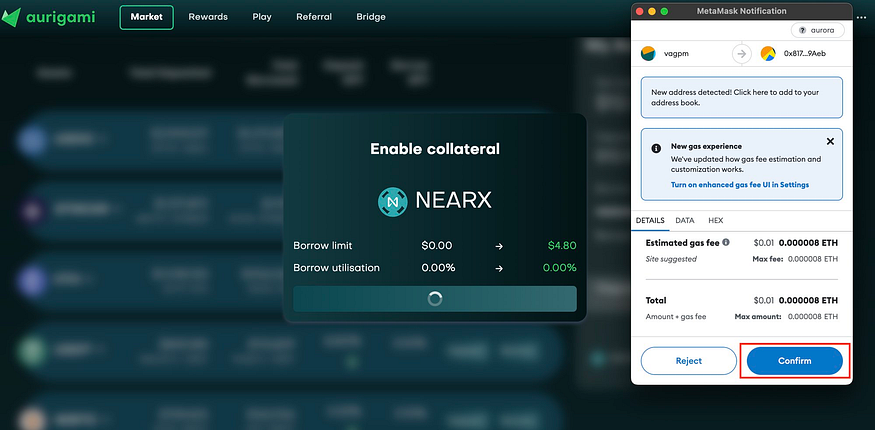
- Click on the “Enable Now” button.
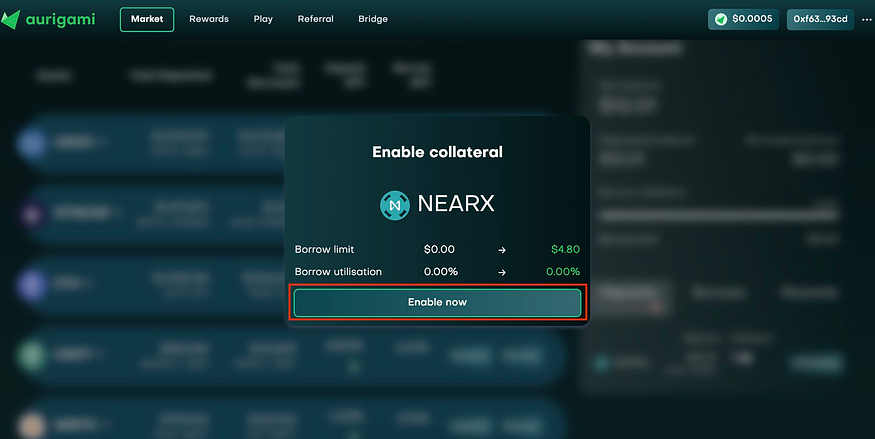
- Sign the transaction in your wallet and the deposited asset will be enabled as collateral.
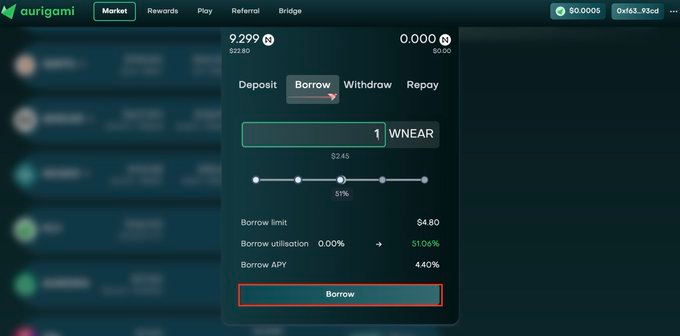
- Check for wNear out of the given options and click on the “Borrow” button.
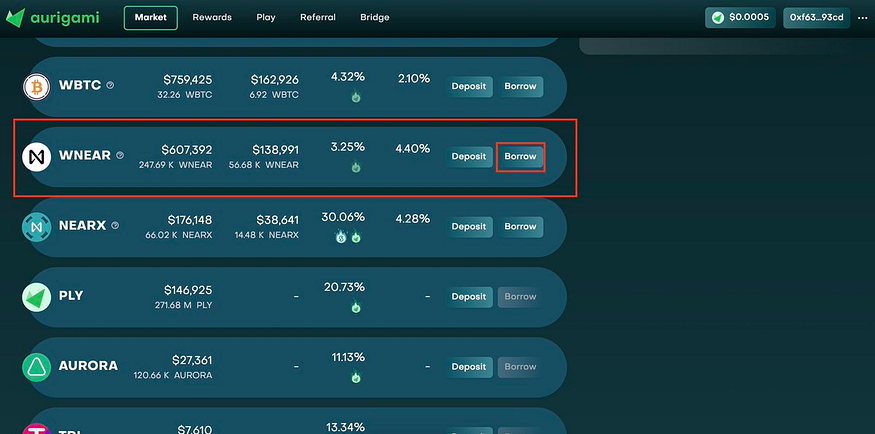
- Enter the amount of wNear you wish to borrow and click on the “Borrow” button.
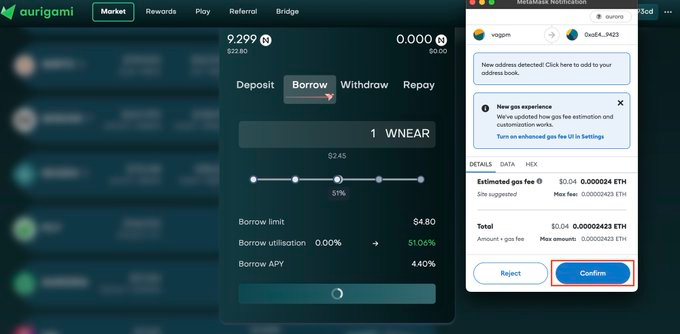
- Approve the transaction on your Wallet.
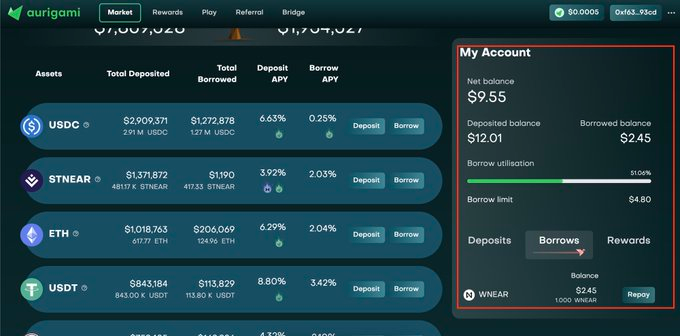
- Done! You can check your borrowed assets in the “My Account” section
That’s it!
Fairly simple, just follow the steps.
Let’s get started right away: Click Here